Build a Raspberry Pi 5 Robot with Mecanum Wheels: Complete Guide
FTC Disclosure: This post contains affiliate links. As an Amazon Associate, I earn from qualifying purchases.
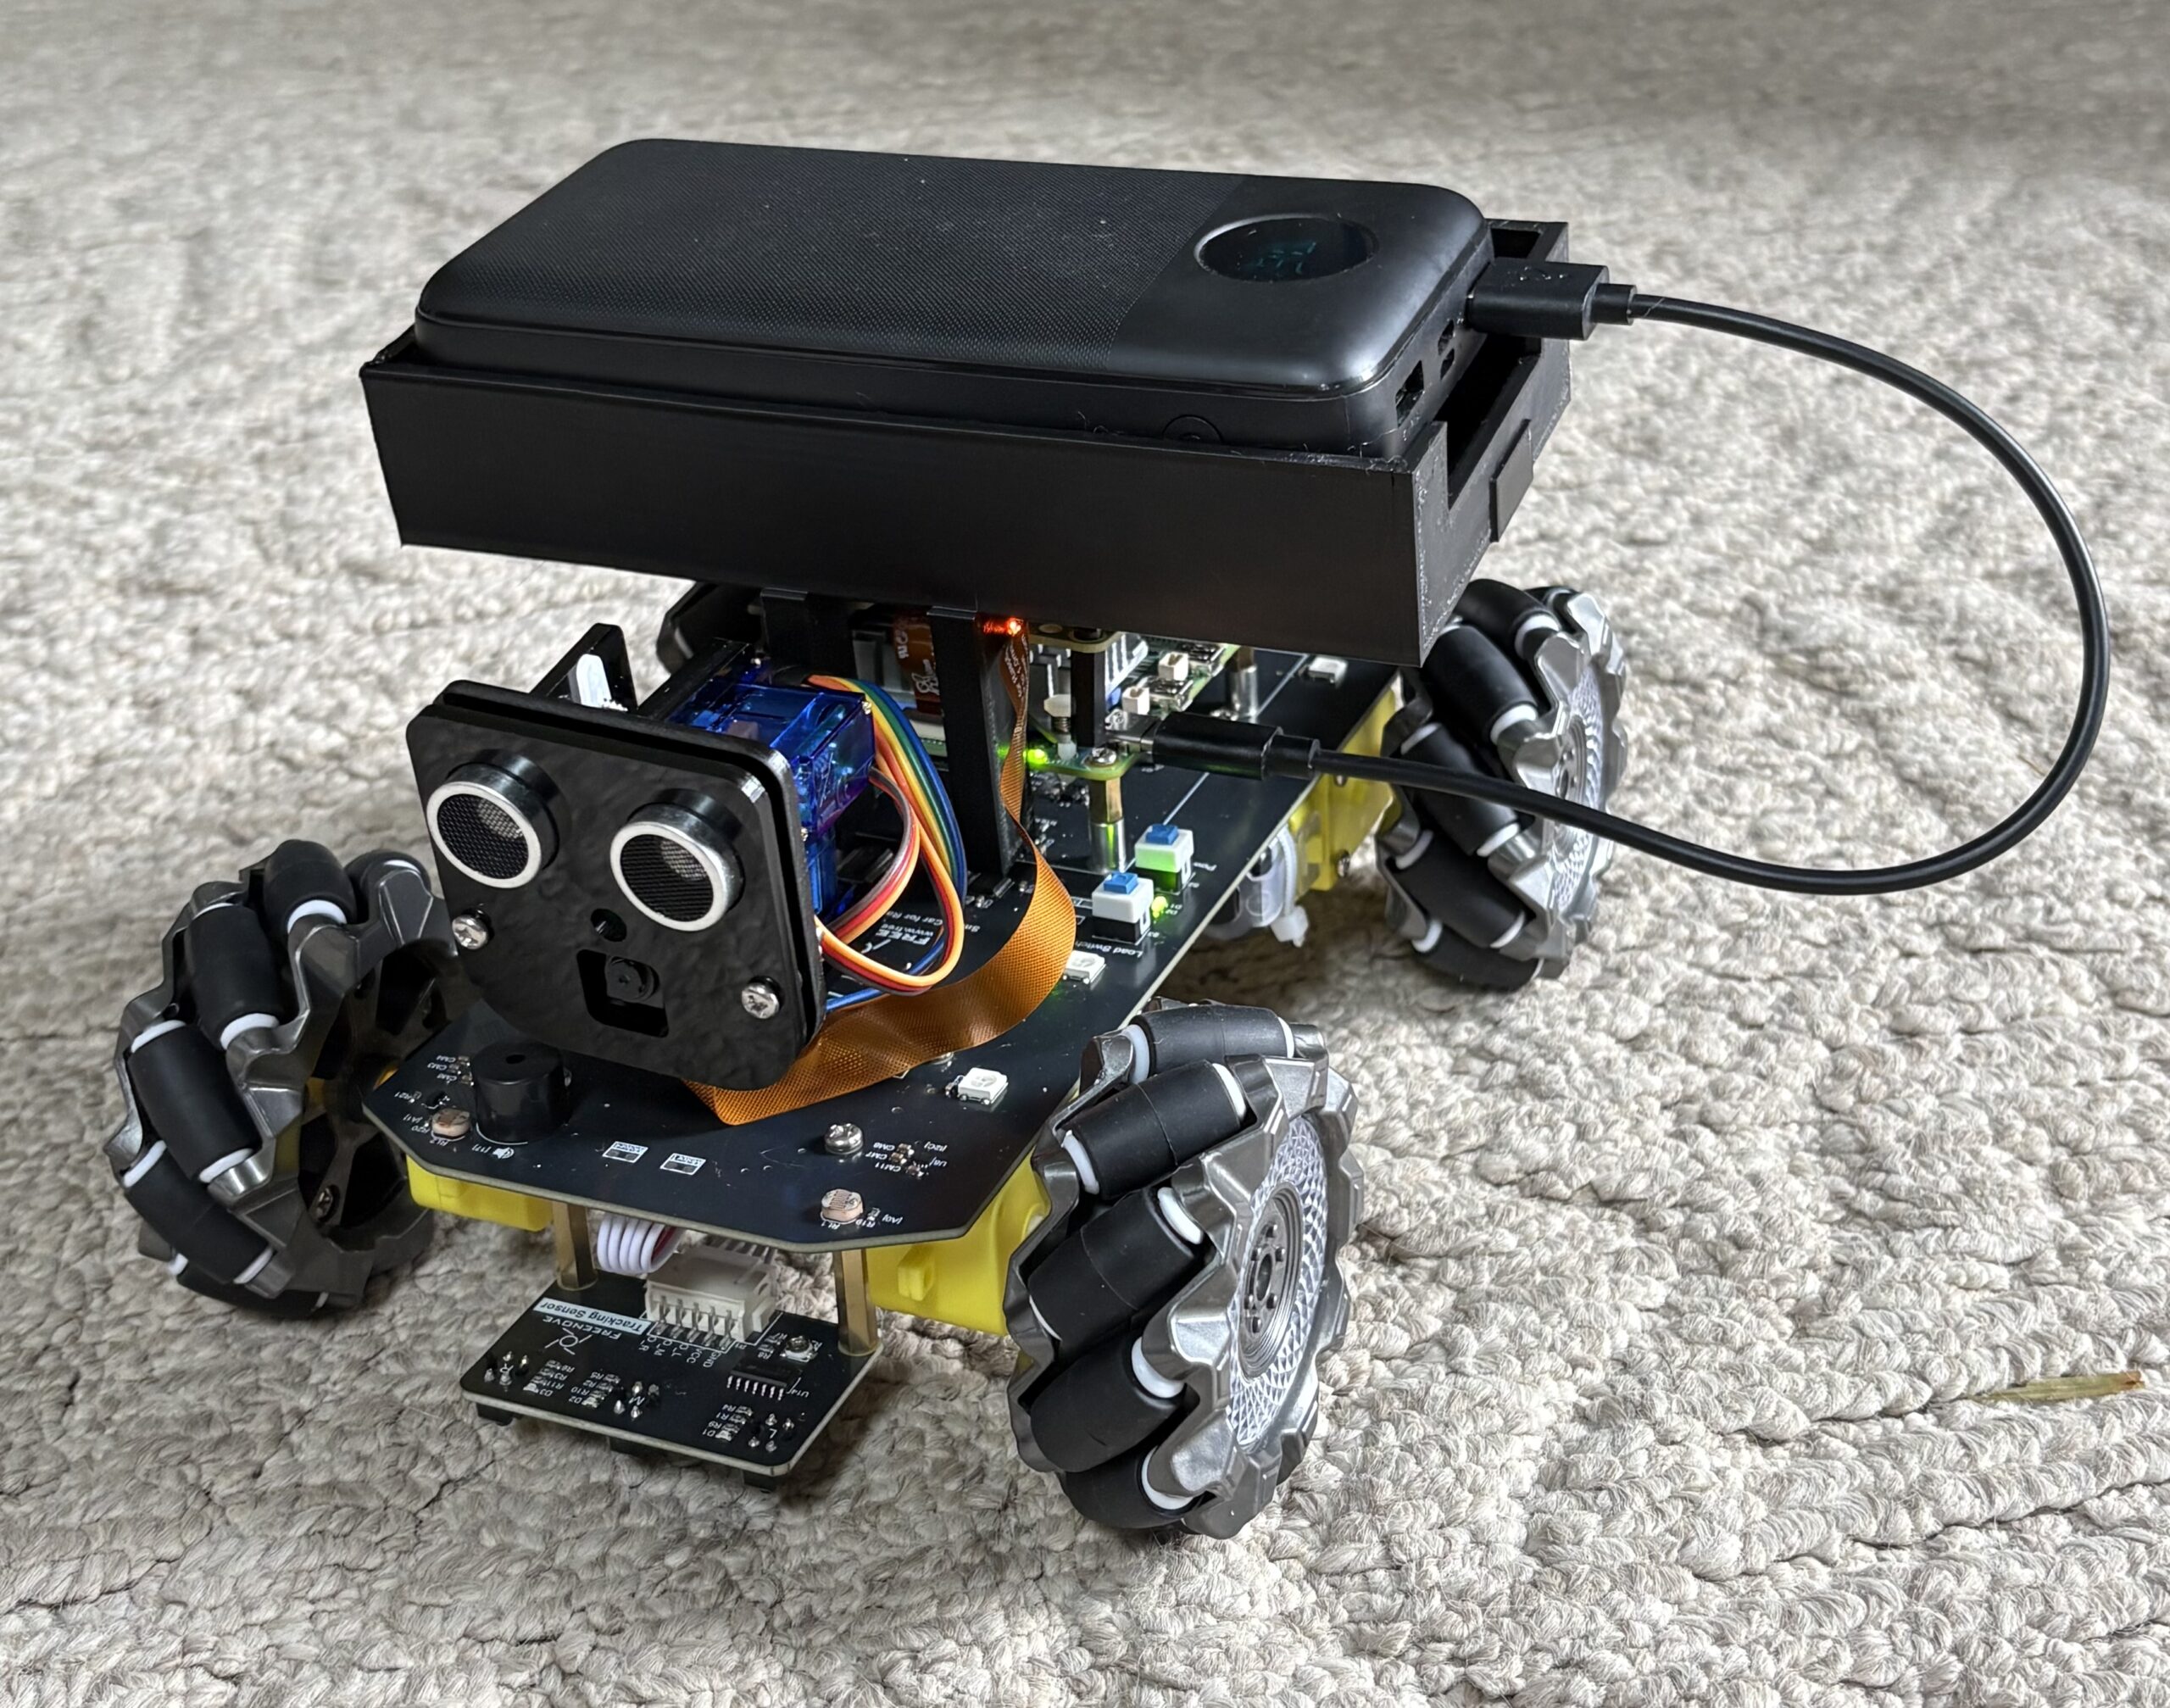
First, building a Raspberry Pi 5 robot with mecanum wheels brings an AI assistant to life in a whole new way. In this guide, I show you exactly how to build KasslClaw Mobile. This robot can move, see, and talk; therefore, it is the perfect project for beginners and advanced makers alike. Specifically, we are turning a static chatbot into a mobile robot that interacts with the real world.
Raspberry Pi 5 Robot Build Overview
The core project is a Raspberry Pi 5 robot with mecanum wheels. Furthermore, the total cost for the main components is only ~$355 CAD. The actual build time is roughly 2-3 hours. Therefore, this project is an excellent way to learn robotics and AI without spending a fortune on professional gear.
The Vision: AI That Can Move
For example, I have run my AI assistant on a Raspberry Pi 5 for months. However, it was always confined to a box on a desk. I started wondering: what if my AI could actually explore? Moreover, what if it could see the room and talk back in real-time?
Today, I am building KasslClaw Mobile. First, this robot carries the AI throughout my home. Consequently, it evolves from a simple interface into a physical entity that can patrol, follow, and interact.
What You Need: Hardware List

Parts List
- Freenove Mecanum Wheel Kit — Robot base (~$90 CAD)
- Raspberry Pi 5 Kit — The brain (26 TOPS)
- Official Raspb Pi AI HAT+ — Build-in 26 Tops Hailo-8 AI Accelerator
- HAT Hardware Kit — To install the AI+ HAT on top
- GPIO Extension Board — Motor connections
- USB Sound Card — Voice output (~$33 CAD)
- USB Microphone — Voice input (~$17 CAD)
- 18650 Batteries — Power source
- Battery Charger — Keep power ready
- Portable Charger Power Bank 40800mAh — Extended mobile power
You will additionally need basic tools. However, the kit includes most of the precision hardware required for assembly.
Software You Need
First, the robot requires a specific software stack to function:
- OpenClaw AI for smart responses
- Python code for motor control
- Camera streaming for live video
- Telegram bot for remote control
- Face recognition with OpenCV
- Object detection with Hailo AI
Why Use Mecanum Wheels?

Normal robots usually turn like tanks. Therefore, they must spin their wheels to change direction. However, Mecanum wheels use special rollers at 45-degree angles. Consequently, your robot can move in any direction without turning its body:
- ✅ Move forward and backward
- ✅ Move side to side (strafing)
- ✅ Move diagonally
- ✅ Spin in place
- ✅ Slide through tight doorways
This furthermore helps the camera stay level while the robot adjusts its position. Additionally, it allows for much smoother navigation in cluttered rooms.
Raspberry Pi 5 Robot Step-by-Step Build Guide
Step 1: Build the Robot (2-3 hours)
The Freenove kit provides everything needed to get moving:
- 4 motors with gears
- Aluminum frame
- Camera mount
- Motor control board
- Sensors (Ultrasonic, Infrared)
- All necessary screws and wires
The assembly is surprisingly easy. Additionally, no soldering is required for this build. Therefore, you can have a rolling chassis ready for electronics in under three hours.
Step 2: Set Up the Software
Voice Commands:
/forward— Move forward/left— Move left/right— Move right/spin— Spin around/patrol— Auto mode/follow— Follow face
After the physical build, furthermore install the control software. Therefore, ensure your Pi OS is fully updated to avoid dependency issues.
Step 3: Add AI Vision
The Pi 5 AI Hat transforms a basic car into a smart machine:
- Face Recognition: “I see Richard in the kitchen”
- Object Detection: “The garage door is open”
- Room Mapping: Learning the home layout
- Motion Detection: Watching for security changes
All processing furthermore happens locally on the Pi. Therefore, no cloud subscription or internet connection is needed for the core AI vision tasks.
Step 4: Add Voice
Finally, integrate voice capabilities for natural communication:
- Wake word detection (e.g., “Hey KasslClaw”)
- Speech-to-text recognition
- AI-generated voice responses
- Telegram voice message support
What Can Your Raspberry Pi 5 Robot Do?
🏠 Home Security
- Patrol your house autonomously
- Detect problems (e.g., “Lights left on”)
- Watch pets while you are away
Because it moves, it furthermore can check corners that fixed cameras simply cannot reach.
🎮 Remote Control
- Drive from anywhere via Telegram
- See live 1080p video stream
- Talk through the robot to people at home
- Perform remote home checks
You can additionally operate the robot while traveling to check on your property.
🤖 AI Features
- Follow you around the room automatically
- Help find lost items using object detection
- Control smart home devices via voice
In conclusion, this physical body makes your AI assistant significantly more useful than a screen.
Cost Breakdown
| Part | Price |
|---|---|
| Robot Kit | ~$90 CAD |
| Raspberry Pi 5 | ~$80 CAD |
| AI HAT+ | ~$95 CAD |
| HAT Hardware Kit | ~$15 CAD |
| GPIO Board | ~$25 CAD |
| Sound Card | ~$33 CAD |
| Microphone | ~$17 CAD |
| Batteries | ~$20 CAD |
| Charger | ~$25 CAD |
| Portable Charger | ~$45 CAD |
| Total | ~$455 CAD |
If you already own a Pi 5, you however only need ~$355 CAD to complete the project.
5-Week Build Plan
To begin, focus on Week 1: Build the chassis and test motors ✅
Next, Week 2: Install camera and set up streaming
Then, Week 3: Implement Telegram remote control
After that, Week 4: Integrate AI vision and Hailo-8
Finally, Week 5: Add voice responses and smart home links
Each week builds on the previous success. Consequently, you will have a fully functional robot by week 3.
Tech Specs
- Speed: ~0.5 m/s
- Battery: 2-3 hours continuous
- Range: ~30m indoor WiFi
- AI Power: 26 TOPS (Hailo-8)
- Camera: 1080p wide angle
- Weight: ~800g
Why Build This Robot?
Most AI assistants sit in speakers or phones, therefore they cannot explore their environment. However, this robot gives AI a physical body:
- 🤖 It can explore rooms independently
- 👁️ It can see and report issues in real-time
- 🗣️ It can talk and move simultaneously
- 🏠 It acts as a real-time helper
It is in conclusion an incredibly rewarding way to see AI move from a screen into the real world.
FAQs
Is this kit good for beginners?
The Freenove kit requires no soldering, therefore it is ideal for beginners. It includes clear instructions and all required hardware. The build takes about 2-3 hours, additionally the code is Python-based. Consequently, it is a great starting point for robotics.
Why are mecanum wheels special?
Mecanum wheels specifically have rollers at 45-degree angles. Therefore, the robot can move sideways without turning. It can also move diagonally or spin in place. Consequently, this makes it perfect for AI vision and navigation.
Can I control it remotely?
The robot uses WiFi and Telegram, therefore you can drive it from anywhere in the world. You additionally get a live video feed and two-way audio.
Do I need a Pi 5?
The kit works with Pi 4B, 3B+, and Zero. Pi 5 is however vastly superior for AI vision. It furthermore provides faster processing and dedicated AI acceleration support.
What can the AI do?
With the Pi 5 AI Hat, the robot can recognize faces, additionally detect objects, track motion, and read QR codes. It furthermore runs all AI locally without needing the cloud.
How long does the battery last?
Two 18650 batteries run the robot typically for 2-3 hours. Battery life varies based on motor usage and AI tasks. Spare batteries can however extend runtime significantly.
Buy Parts Here
- Robot Kit: Freenove Kit on Amazon
- Pi 5: Raspberry Pi 5 Kit
- AI HAT+: Official Raspb Pi AI HAT+
- HAT Hardware Kit: Hardware Kit for AI HAT+
- GPIO Board: GPIO Extension
- Sound: USB Sound Card
- Mic: USB Microphone
- Batteries: 18650 Pack
- Charger: Battery Charger
- Portable Charger: Power Bank 40800mAh
What is Next?
I will be posting more detailed guides soon:
- Part 2: Assembly photos and common pitfalls
- Part 3: Motor control code and calibration
- Part 4: AI vision setup and Hailo-8 optimization
- Part 5: Smart home integration and voice commands
Stay tuned, additionally get your parts ready to start building.
Questions? Drop a comment below or message me on Telegram! I would furthermore love to hear your ideas for new AI robot features.
Part 2 is coming soon. Subscribe for updates!